OpenAI for Web:构建应用的指南
让我们探索如何与OpenAI API进行交互并创建一个简单的网页应用程序。
ChatGPT确实很有趣,值得探索和玩耍。如果你想让ChatGPT完成单一任务并让用户更容易访问,该怎么办呢?在我使用OpenAI的API创建应用程序过程中,加入我,希望能给你一些创造自己应用的想法和启示。
我将使用bun、Next.js和其他一些包来简化尝试的过程。您可以随时查看项目仓库,了解它是如何结合在一起的。我将尽量在代码示例中包含真实项目文件的相对路径。
目录
- 完成- 最简单的可能的示例- 流式输出
- 聊天完成- 最简例- 互动聊天
- 使用Next.js的聊天界面
- 带有Next.js的翻译器界面
- 结论
完成
最简单的例子
这个例子使用的完成 API 可能很快就会被废弃,如果还没有的话。完成的目的是为了采用我们的提示,并尝试完成剩下的部分。当然,我们可以尝试包含指令以获取更结构化的回应。
// bin/1a-completion.ts

import OpenAI from "openai";

const openai = new OpenAI({
  apiKey: process.env.OPENAI_API_KEY!,
});

const prompt = `Fill in the blanks.
Today is Dec 1, 2023.
My name is Robert Downey Jr. and I'm a __ years old actor.
My top grossing movie is __ and I played __ in it.`;

const response = await openai.completions.create({
  model: "gpt-3.5-turbo-instruct",
  prompt,
});

console.log(response.choices[0].text);
> bun run bin/1a-completion.ts


Today is Dec 1, 2023.
My name is Robert Down
在运行上面的代码后,您会注意到响应会提前截断。原因是完成 API 的默认令牌大小非常低。您可以在这里阅读更多关于令牌的信息。本质上,令牌是我们提示和从模型中期望的响应的总大小。
让我们修改我们的参数,包括令牌大小,再试一次。
 // bin/1b-completion.ts

 const response = await openai.completions.create({
   model: "gpt-3.5-turbo-instruct",
   prompt,
+  max_tokens: 1024,
 });
> bun run bin/1b-completion.ts


Today is Dec 1, 2023.
My name is Robert Downey Jr. and I'm a 58 years old actor.
My top grossing movie is Avengers: Endgame and I played Iron Man/Tony Stark in it.
这样更像了。现在我们有了完整的输出。
流式输出
我们要做的最后一件事是使用完成 API 进行输出流。这样,我们不需要等待整个响应准备好;相反,我们将输出流,并在到达时显示它,类似于使用 ChatGPT 时的体验。
同时,我们还可以将我们的OpenAPI客户端放到单独的文件中。在这里它们两个。
// bin/client.ts

import OpenAI from "openai";

export const openai = new OpenAI({
  apiKey: process.env.OPENAI_API_KEY!,
});


// bin/1c-completion.ts

import { openai } from "./client";

const prompt = `Fill in the blanks.
Today is Dec 1, 2023.
My name is Robert Downey Jr. and I'm a __ years old actor.
My top grossing movie is __ and I played __ in it.`;

const chunks = await openai.completions.create({
  model: "gpt-3.5-turbo-instruct",
  prompt,
  // return response as chunks rather than a complete output
  stream: true,
  max_tokens: 1024,
});

// We'll print the response from the API as we receive it.
for await (const chunk of chunks) {
  const content = chunk.choices[0].text;
  if (content) {
    process.stdout.write(content);
  }
}
聊天完成
聊天完成需要一个结构化的输入,还可以让我们在初始消息中添加指示。这样,我们就可以将指示与用户输入和模型响应分开。
最简单的示例
“系统”角色用于前置指令或任何其他附加信息,我们可能希望在以后的模型中提供。这个示例发送单个用户输入并流式传输输出,就像我们使用自动补全一样,但这一次,我们能够使用更广泛的模型范围(例如gpt-3.5-turbo或gpt-4),而且我们可以跳过设置max_tokens,除非我们需要它。
// bin/2a-chat.ts

import { openai } from "./client";

const chunks = await openai.chat.completions.create({
  model: "gpt-3.5-turbo",
  messages: [
    {
      role: "system",
      content:
        "You are a helpful assistant and you always address users as friend.",
    },
    {
      role: "user",
      content: "Hello, how are you?",
    },
  ],
  stream: true,
});

for await (const chunk of chunks) {
  const content = chunk.choices[0].delta.content;
  if (content) {
    process.stdout.write(content);
  }
}
交互式聊天
为了进一步提高,这里有相同的示例,即发送消息和流式传输响应,但这一次,我们读取用户输入而不是发送固定消息。此外,我们收集了用户和模型响应的所有消息。这些消息与用户的任何新输入一起发送。这个过程使模型能够在生成响应时具有上下文并理解历史记录。
// bin/client.ts

import OpenAI from "openai";

export const openai = new OpenAI({
  apiKey: process.env.OPENAI_API_KEY!,
});

export type Message = OpenAI.Chat.Completions.ChatCompletionMessageParam;


// bin/2b-chat.ts

import { Message, openai } from "./client";

// This is our message history.a
// We'll collect messages from the user and the assistant here.
const messages: Message[] = [
  {
    role: "system",
    content:
      "You are a helpful assistant and you always address users as friend and you havily use emojies.",
  },
];

// This helper function will send the messages to the API and stream the response.
const completeAndStream = async (messages: Message[]) => {
  const chunks = await openai.chat.completions.create({
    model: "gpt-3.5-turbo",
    messages,
    stream: true,
  });

  // We are collecting the response from the API so we can return complete message.
  // This is not necessary for the chat to work.
  let response = "";

  // We'll print the response from the API as we receive it.
  for await (const chunk of chunks) {
    const content = chunk.choices[0].delta.content;
    if (content) {
      process.stdout.write(content);
      response += content;
    }
  }
  return response;
};

// Initial prompt for the user.
console.log(`
I'm your helpful assistant. Ask me anything and when you're done, say "bye".
> chat:`);

/**
 * This is the main loop of the chat.
 * We'll read lines from the user and send them to the API.
 * Then, we'll print the response from the API.
 * Finally, we'll print a new prompt for the user.
 */
for await (const line of console) {
  messages.push({ role: "user", content: line });

  console.log("< assistant:");
  const response = await completeAndStream(messages);
  messages.push({ role: "assistant", content: response });

  // We'll print a blank line to separate the messages.
  console.log("");
  console.log("");

  // If the user says "bye", we'll exit the program.
  if (line === "bye") {
    process.exit(0);
  }
  console.log("> chat:");
}
使用Next.js的聊天接口
使用所有推荐的设置创建一个Next.js应用程序,并确保选择App Router。我们不一定要在页面上使用应用程序路由器,但是在使用应用程序路由器并且需要在边缘上运行时,更容易标记API端点以便在Vercel上部署时流式传输响应。我不确定是否需要,但我们只是简单处理。我们将使用相同的openai包进行后端操作,并添加Vercel AI SDK以便更轻松地将响应流式传输到前端。
以下是我们的聊天后端代码,可以通过/api/chat端点进行访问。
// src/app/api/chat/route.ts

import OpenAI from "openai";
import { OpenAIStream, StreamingTextResponse } from "ai";

// Run on the edge runtime.
export const runtime = "edge";

const openai = new OpenAI({
  apiKey: process.env.OPENAI_API_KEY!,
});

export async function POST(req: Request) {
  // Extract the `messages` from the body of the request
  const { messages } = await req.json();

  // Request the OpenAI API for the response based on the prompt
  const response = await openai.chat.completions.create({
    model: "gpt-3.5-turbo",
    stream: true,
    messages: messages,
  });

  // Convert the response into a friendly text-stream
  const stream = OpenAIStream(response);

  // Respond with the stream
  return new StreamingTextResponse(stream);
}
对于聊天界面,SDK将处理所有我们的需求,包括读取和清除用户输入,将我们的请求发送到模型并收集来自模型的所有消息,包括流式传输。
// src/pages/chat.tsx

// Pseudo page component for chat interface

export default function ChatPage() {

  const { messages, input, handleInputChange, setInput, append, isLoading } =
    useChat({
      api: "/api/chat",
      initialMessages: [
        {
          id: "initial",
          role: "assistant",
          content:
            "Hello, I'm your OpenAI assistant. How can I help you today?",
        },
      ],
      onError: (error) => {
        notifications.show({ message: error.message, color: "red" });
      },
    });

  const handleSend = useCallback(() => {
    append({ role: "user", content: input });
    setInput("");
  }, [append, input, setInput]);

  return (
    <Container>

      <ChatContainer>
        {messages.map((message) => {
          switch (message.role) {
            case "user":
              return (
                <UserMessage key={message.id} message={message.content} />
              );
            case "assistant":
              return (
                <BotMessage key={message.id} message={message.content} />
              );
            default:
              return null;
          }
        })}
        </ChatContainer>

        <InputContainer>
          <Textarea
            value={input}
            onChange={handleInputChange}
            disabled={isLoading}
          />
          <Button
            disabled={!input.length}
            loading={isLoading}
            onClick={handleSend}
          >
            Send
          </Button>
        </InputContainer>

    </Container>
  );

}
完整示例可在存储库中获取。
Next.js的翻译界面
我们可以指导模型接受结构化数据,并使用部分数据作为完成变量。让我们创建一个翻译界面,并使用如下的载荷。
type Payload {
  from: string,
  to: string,
  text: string,
}
语言列表
我们需要列出一份语言列表,以供用户选择语言对。嘿,我们可以使用ChatGPT来帮助完成这个任务。
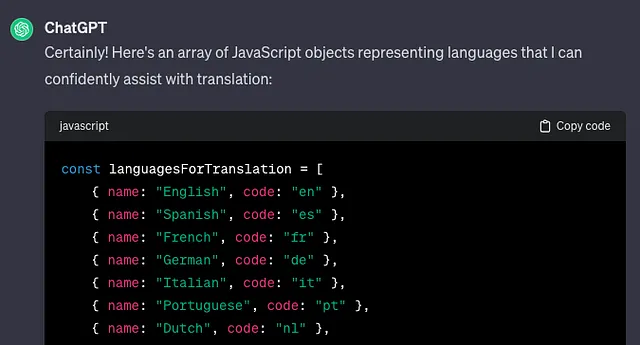
好的。我们会把它放入一个文件中。
// src/app/api/languages.ts

const languages = [
  {name: "English", code: "en"},
  {name: "Spanish",code: "es"},

  ...

];
如果想要验证用户输入,而这是我们绝对应该做的,您可以在下方使用zod找到一个示例模式。
// src/app/api/types.ts

import { z } from "zod";

export const UserPayload = z.object({
  from: z.string().length(2),
  to: z.string().length(2),
  text: z.string().min(1),
});

export type UserPayload = z.infer<typeof UserPayload>;
现在我们将要处理稍微更复杂的用户输入,我们将采用更受控制的方法来管理和处理它。
// src/pages/translate.tsx

// Pseudo page component for translator interface

import { useChat } from "ai/react";

export default function TranslatePage() {

  const { messages, append, isLoading } = useChat({
    api: "/api/translate",
    initialMessages: [
      {
        id: "initial",
        role: "assistant",
        content: "Choose language pair and send your text to translate",
      },
    ],
  });


  const [text, setText] = useState("");

  const [selectedLanguages, setSelectedLanguages] = useState<{
    from: string;
    to: string;
  }>();

  const handleSend = useCallback(() => {
    if (selectedLanguages) {
      append({
        role: "user",
        // convert structured data to string to make it compatible with ai sdk
        content: JSON.stringify({ ...selectedLanguages, text }),
      });

      // Clear user input
      setText("");
    }
  }, [append, selectedLanguages, text]);

  return (
    <Container>

      <ChatContainer>
        {messages.map((message) => {
          switch (message.role) {
            case "user":
              return (
                <UserMessage key={message.id} message={message.content} />
              );
            case "assistant":
              return (
                <BotMessage key={message.id} message={message.content} />
              );
            default:
              return null;
          }
        })}
        </ChatContainer>

        <InputContainer>
          <LanguageChooser
            onChange={setSelectedLanguages}
          />
          <Textarea
            value={text}
            onChange={(e) => setText(e.target.value)}
            disabled={isLoading || !selectedLanguages}
          />
          <Button
            disabled={!input.length}
            loading={isLoading}
            onClick={handleSend}
          >
            Send
          </Button>
        </InputContainer>

    </Container>
  );

}
在为模型撰写指令时,我们可以尝试将解析载荷的工作留给模型。这可能需要尝试几次,并确保我们的载荷包含了模型需要使用的所有数据。这也是为什么我们不应该跳过验证用户输入的另一个原因。以下是用于/api/translateendpoint的完整后端代码。
// src/app/api/translate/route.ts

import { OpenAIStream, StreamingTextResponse } from "ai";
import { NextRequest } from "next/server";
import { openai } from "@/app/api/openai-client";
import { UserPayload } from "@/app/api/types";

export const runtime = "edge";

const instructions = `You will be provided a json object with "from", "to" and "text" properties.
You should return the translated text.
Response should be text/plain.`;

export async function POST(req: NextRequest) {
  const { messages } = await req.json();

  UserPayload.parse(JSON.parse(messages[messages.length - 1].content));

  const response = await openai.chat.completions.create({
    model: "gpt-3.5-turbo",
    stream: true,
    messages: [
      { role: "assistant", content: instructions },
      ...(messages || []),
    ],
  });

  const stream = OpenAIStream(response);
  return new StreamingTextResponse(stream);
}
这是一个工作示例,展示了最终应用程序可能的样子。
您可以在存储库页面的关于部分找到工作应用程序的链接(如果仍然有效)。
结论
在了解了如何与openai api进行通信之后,实现你梦想中的应用场景只是时间和想象力的问题。最后,为了控制用户可以发出的请求数量,请不要忘记使用Vercel轻松地实现速率限制。我还将在存储库中包含一个示例。
谢谢。